
Add your first subscription
Create a subscription in a few taps, with the right price, period and start date.
Everything in Subscrr starts with one subscription. Adding it takes about fifteen seconds.
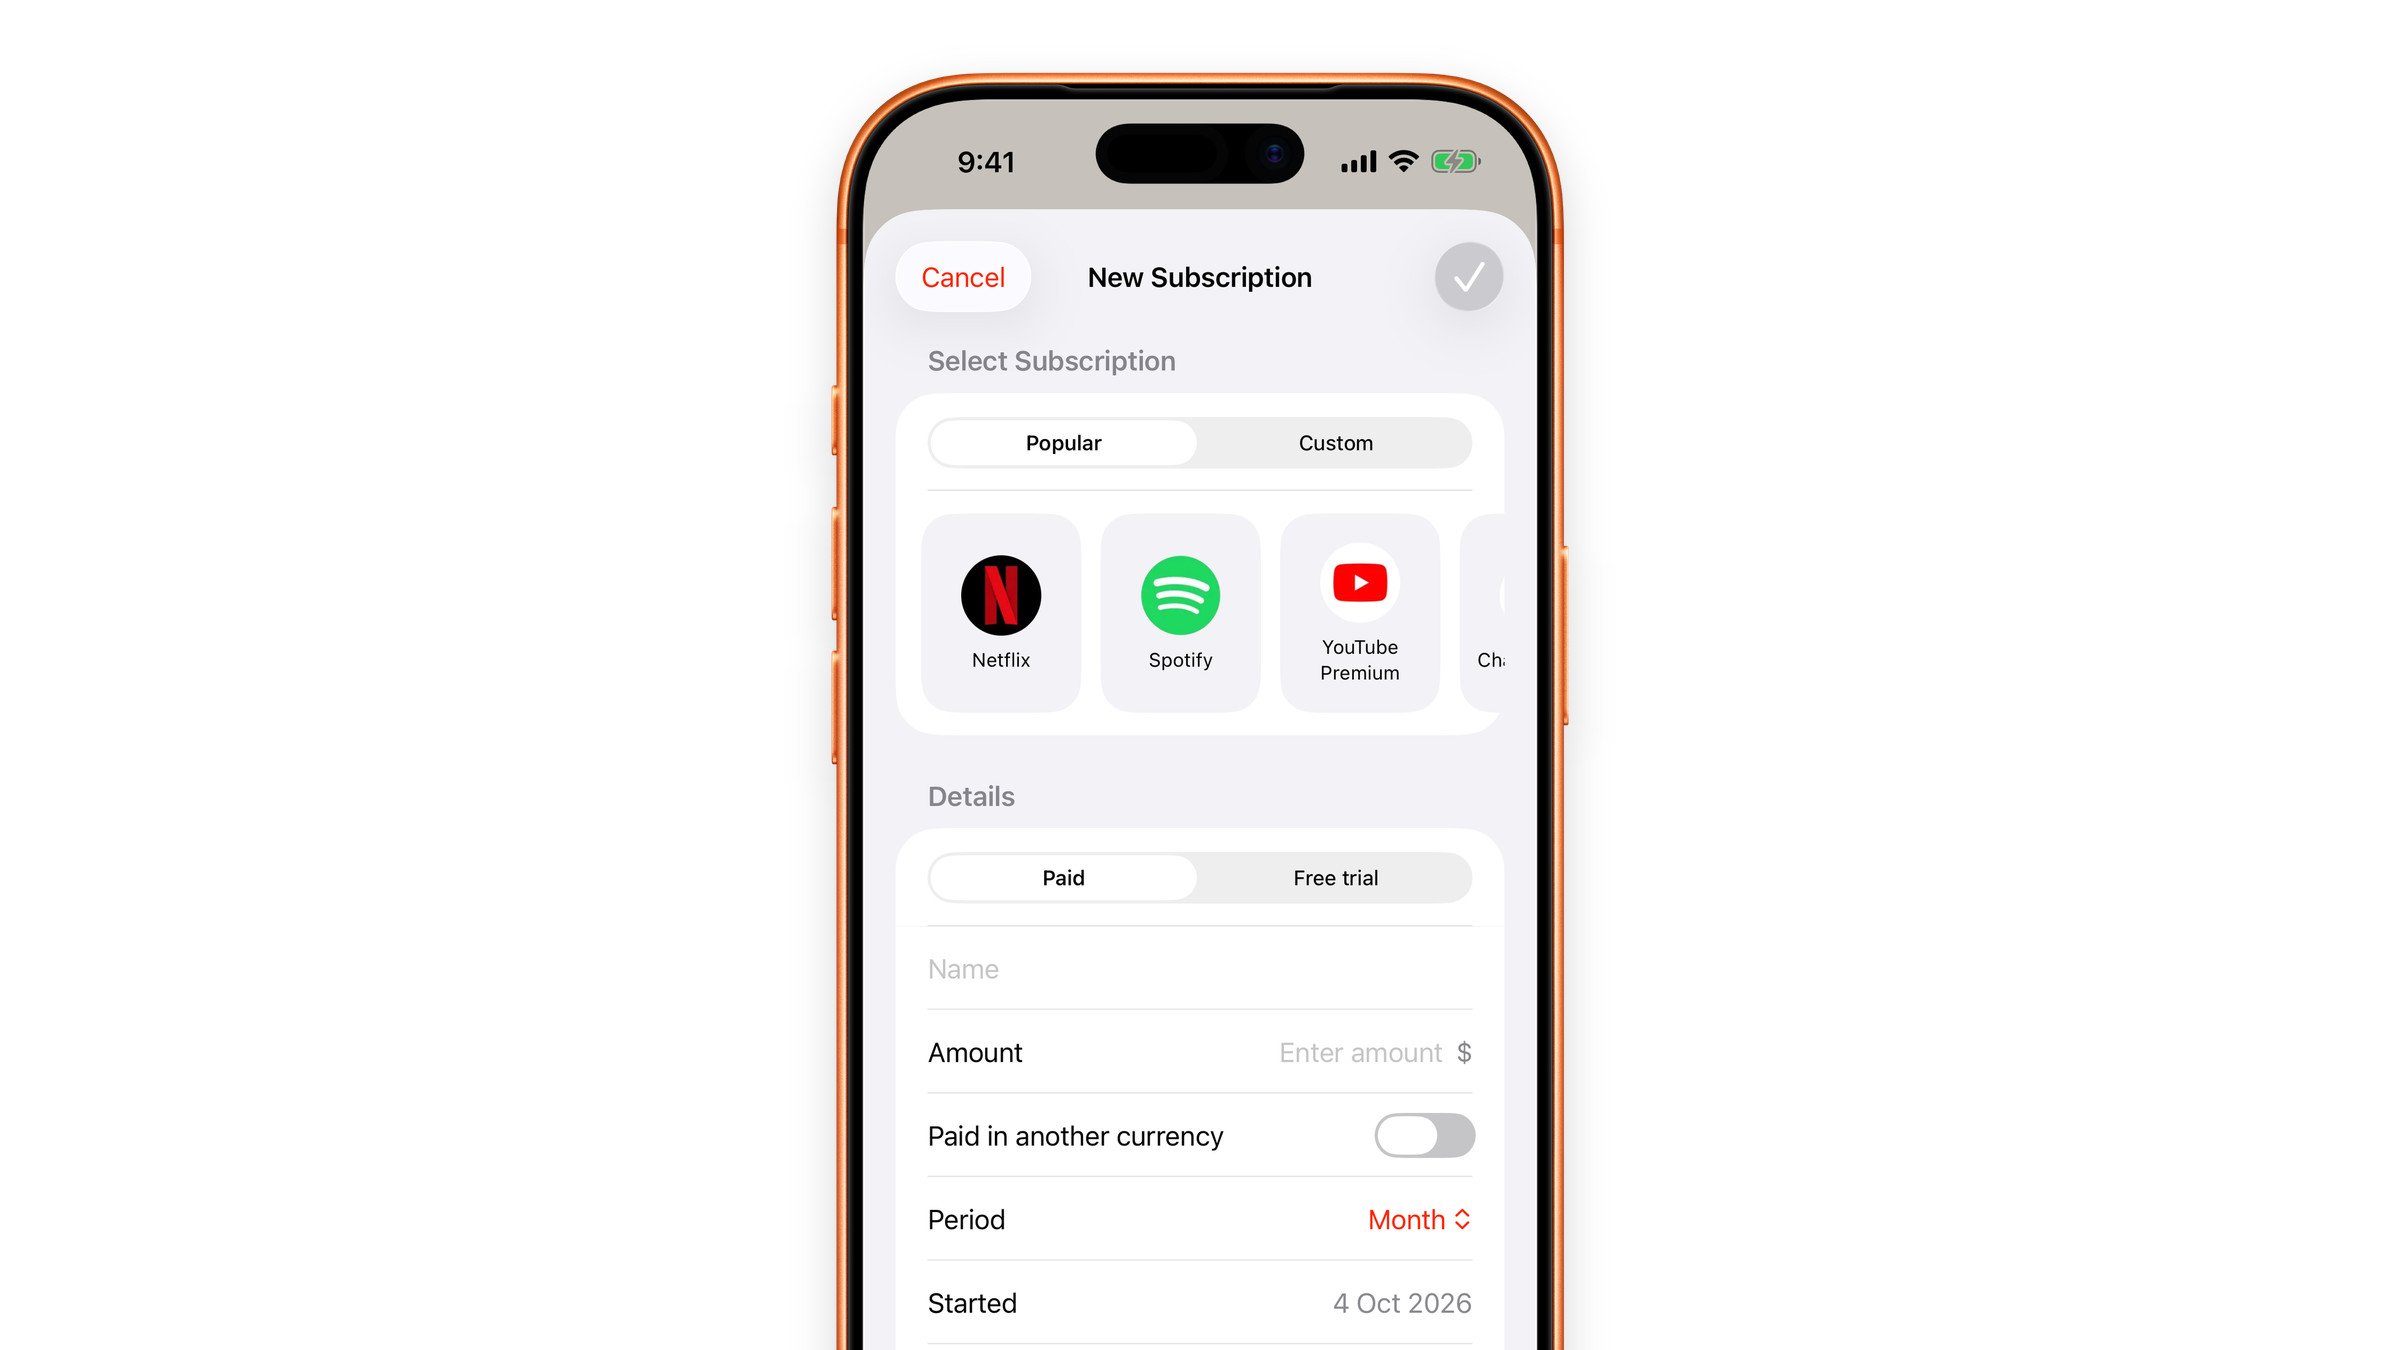
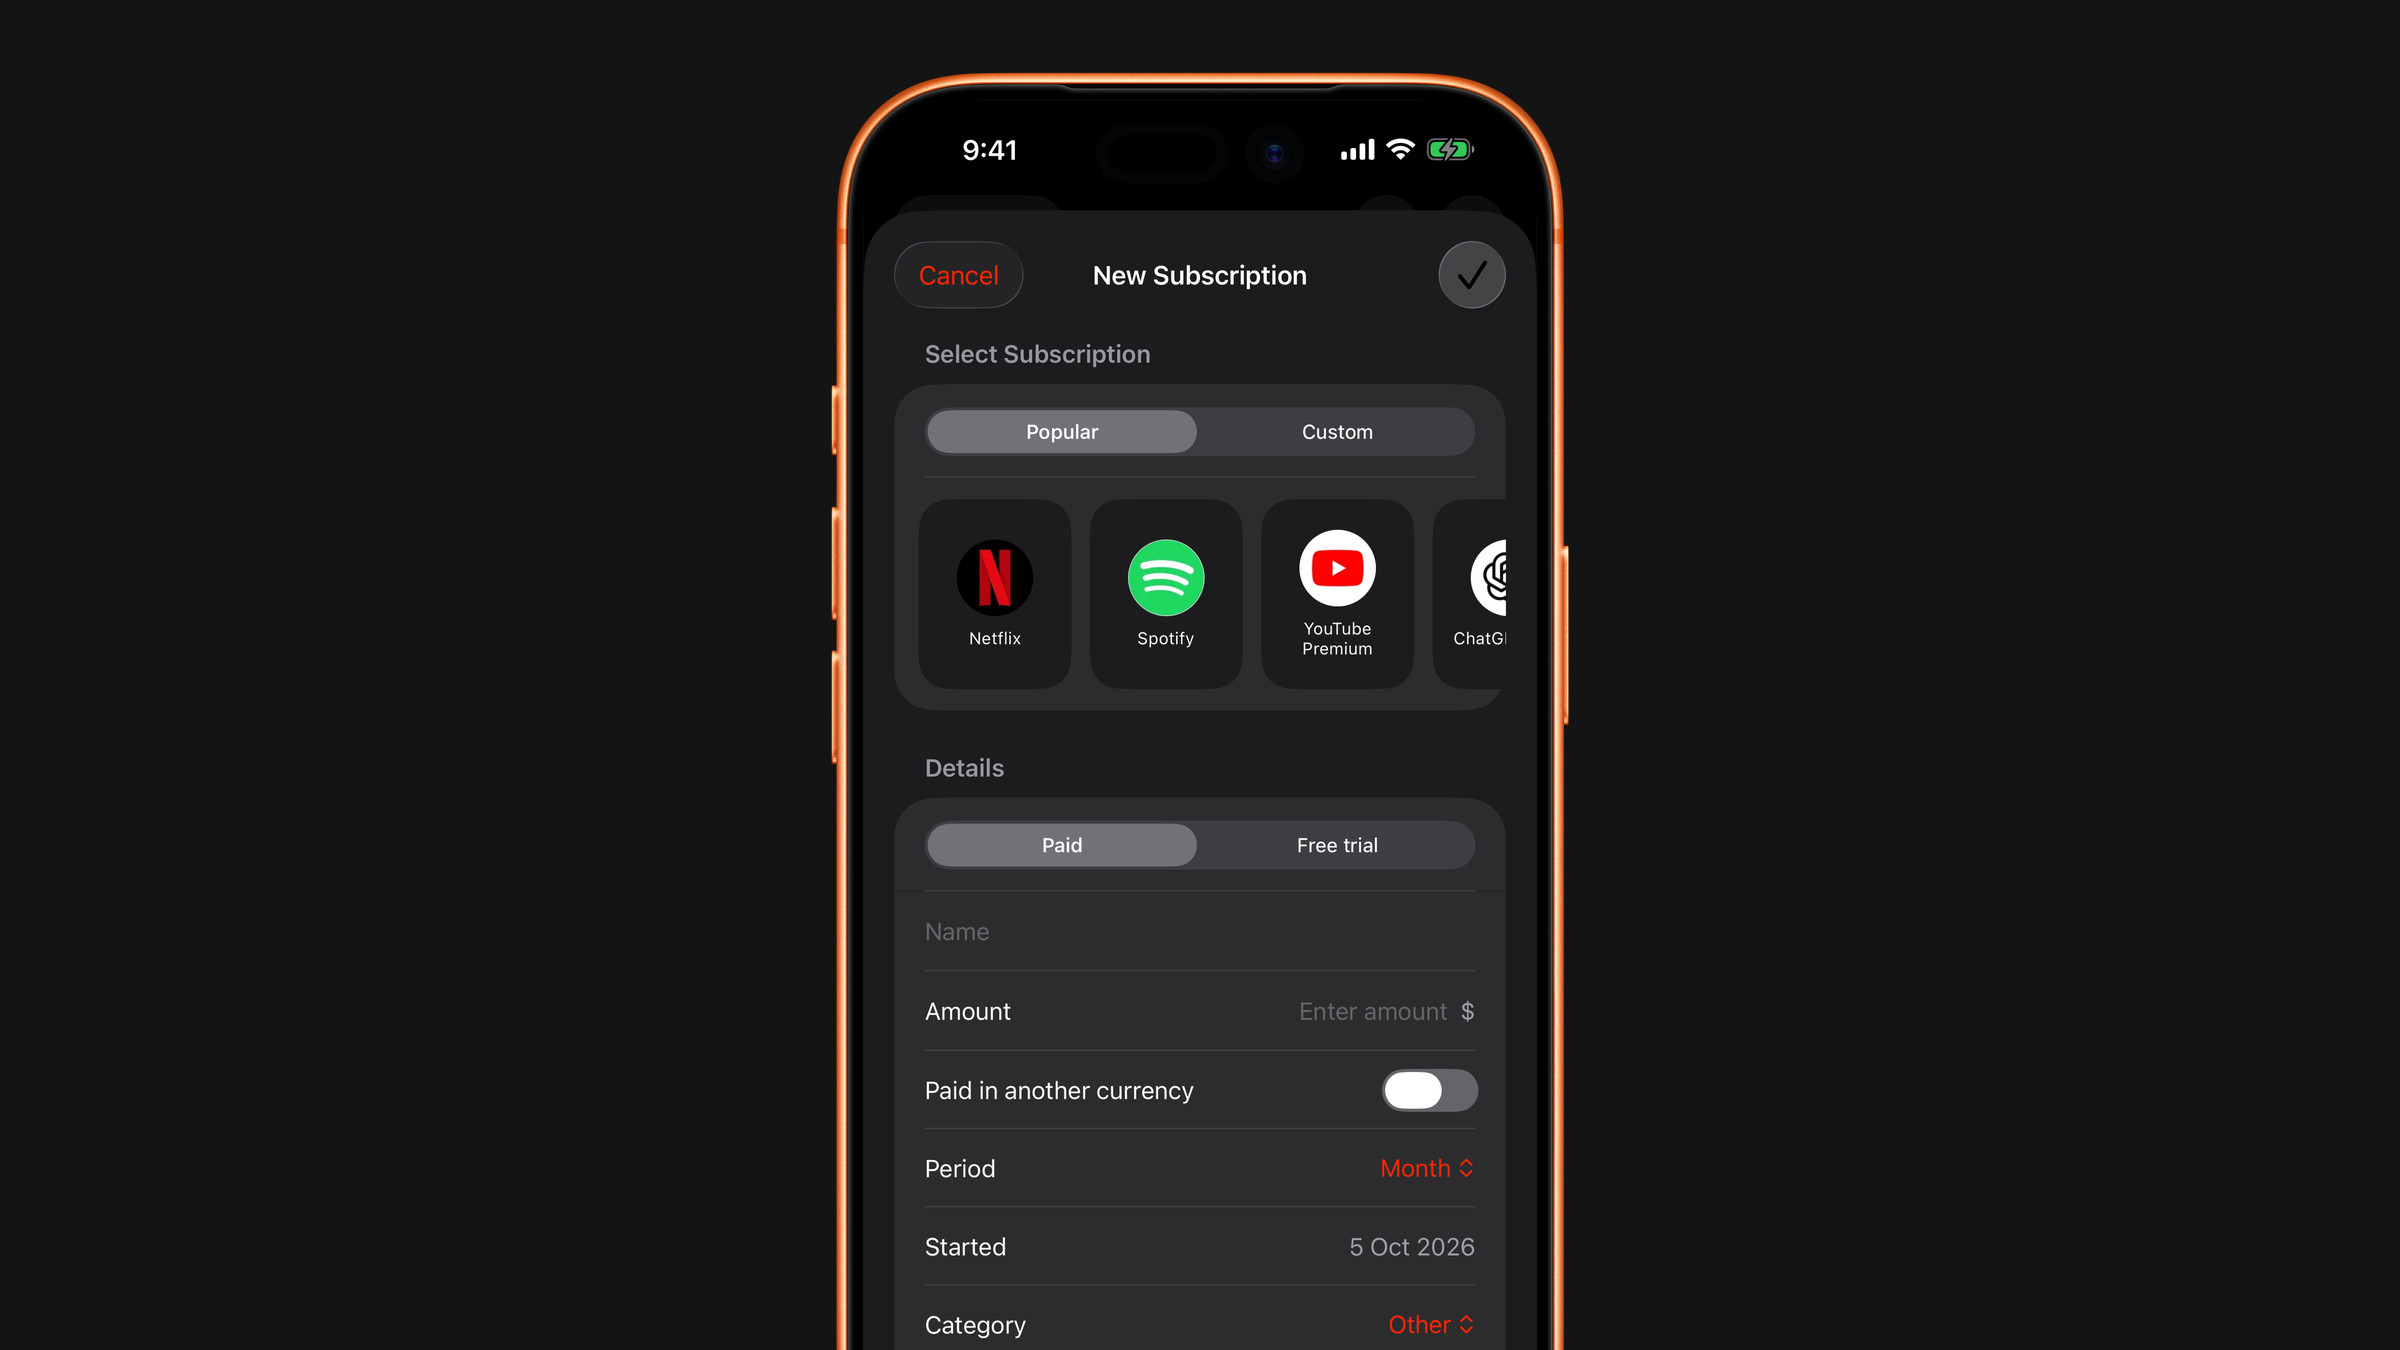
Add it
- Open the Subscriptions tab and tap the plus button. A menu opens with Add Subscription and Import from App Store. Choose the first.
- The New Subscription sheet opens on Popular: a row of well-known services with their logos. Tap one and its name, icon, category and cancellation link are filled in for you. Switch to Custom to enter everything yourself. You can also type in Name, or use the search field at the bottom, to find a service by name: pick a match to take over its name and logo, or tap the Create row with your own wording if yours is not there.
- Under Details, the first switch is Paid / Free trial. Leave it on Paid for a normal subscription.
- Fill in Name and Amount. Enter the price exactly as it is charged to you. The amount is in your default currency, shown at the end of the row. If the service charges you in another one, switch on Paid in another currency and pick that currency.
- Choose the Period: week, month, 3 months, 6 months, year, or Custom for a custom interval.
- Set Started. This is the day the subscription started, or any day it was charged. Subscrr counts forward from it in steps of the period to find the next charge, and reminders and forecasts are built on that, so it is worth getting right. Tap the row and pick the day on the calendar.
- Tap the check mark at the top right to save.
Only Name and Amount are required. The check mark stays grey until both are filled in. With Free trial the amount can stay empty, the subscription is marked Trial in the list, and its reminder warns that the trial is about to turn paid.
The rest of the form
Everything else has a sensible default, and you can come back to it later through edit:
- Category: where it appears in the category list on the Overview.
- Duration: Ongoing, Until a date, or One-time payment. See Set a duration or a one-off.
- Shared with others: how many people split the cost. See Split a subscription's cost.
- Exclude from totals: keeps it in the list but out of the monthly and yearly totals.
- Comment: a note to yourself, for instance which account email it is under.
- Billed via: Apple (App Store), the service website, or not sure. This decides where Manage Subscription takes you when you want to cancel.
- Icon, under Appearance: the brand logo, a symbol, or your own photo.
What happens next
The subscription appears in the list with its next charge date, and the totals on Overview update immediately. If reminders are on, Subscrr schedules a notification before that next charge, at the time and with the lead time you chose in Settings → Notifications.
The first time you save a subscription, iOS asks whether Subscrr may send notifications, if you have not decided already. Allow it: without permission no reminder can arrive. See Turn on renewal reminders.
Not sure of the exact renewal date? Open iOS Settings, tap your name, then Subscriptions, and Apple shows the renewal date for anything billed through the App Store.
Next steps
- Import subscriptions you already pay for
- Turn on renewal reminders
- Choose your display currency
- A quick tour of the app, if you want the whole picture first
- Edit or delete a subscription, for when a price changes
Did this answer your question?